
How To Quickly Break In New Shoes With NO PAIN
Got a new pair shoes and want to skip the slow torture of breaking them in?
Learn from my mistakes and steal my top tried and true methods of breaking in new shoes with no pain! Depending on the shoes, I sometimes use a mix of these methods to get the desired results.
Bear in my mind though… if you’re trying to break in a pair of already uncomfortable shoes to begin with, they’re not going to feel that much better on your feet.
If there’s any life lesson I’ve learned the very hard way, it’s my (very! 🥲) painful trip to Japan where we were averaging 45k steps a day and I was wearing the wrong walking shoes. 😭😭😭 Believe me when I say that having the right travel shoes can really make or break your vacation!
But if your shoes are uncomfortable simply because they’re new AND need some break-in period, you’ll love these tips and tricks for quickly breaking in new shoes with NO pain! 👇
This post may contain affiliate links through which I may make a commission at no extra cost to you. As an Amazon Associate I earn from qualifying purchases – thank you! Please read full disclosure for more information.
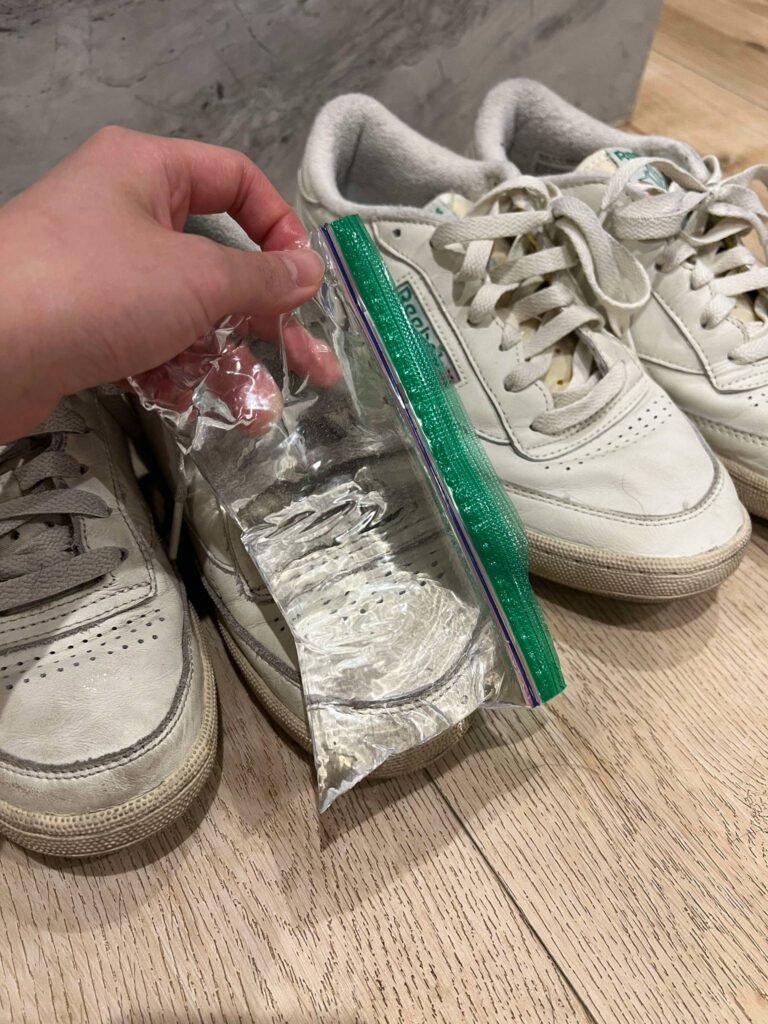
ZIPLOCK FREEZER METHOD
This is my ultimate go-to method for quickly breaking in shoes, especially for footwear with narrower toe boxes and stiffer materials. My husband has reallyyyy wide feet, so this method is a must to loosen up the material and widen the toe box so the sides of his feet don’t rub from that “new shoe tightness.”
I did this with both my husband and I’s travel shoes – our beloved vintage Reeboks – the first time we ever got them fresh out of the box. And yes, we have matching sneakers and are proud of it! 🤗
In fact, I use this method with ALL of my new travel shoes and walking shoes, and the best part is that I get to skip the painful part of stretching them out, and you’ll see AND feel the results overnight!
READ: MUST PACK: Best Walking Shoes For Travel In Europe
Here’s how:
- Fill sealable ziplock bags with water and remove as much excess air as possible. Make sure the bag is completely sealed and squeeze it a little to make sure no water leaks out.
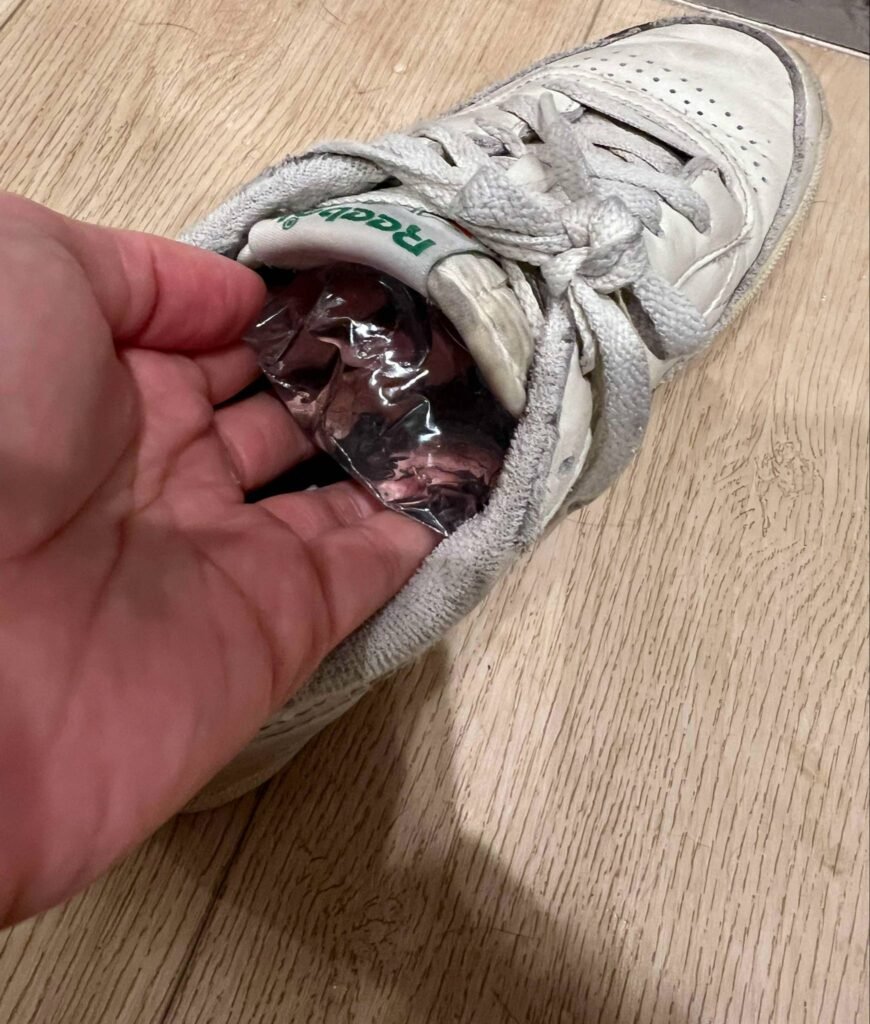
- Put the bags into the tight areas of the shoes and adjust the positioning so that it fills the target area as much as possible. (My shoes tend to feel tight in the toe box area, so I push my bag to this area and make sure that the bag completely fills up the width of the toe box)
- Place your shoes into the freezer and leave them overnight so that the water has sufficient time to freeze and expand the tight areas.
- The next day, remove your shoes from the freezer and let the bags thaw a little before removing – just enough for the bags to wiggle out of the shoes easily.
- Try on your shoes with socks (skip socks if not needed) and walk around in them – you should be able to instantly feel the tight spots loosened up.
- Repeat on the same area or other target areas if needed.
READ: TRIED & TESTED: My 3 FAVORITE Walking Shoes For Europe
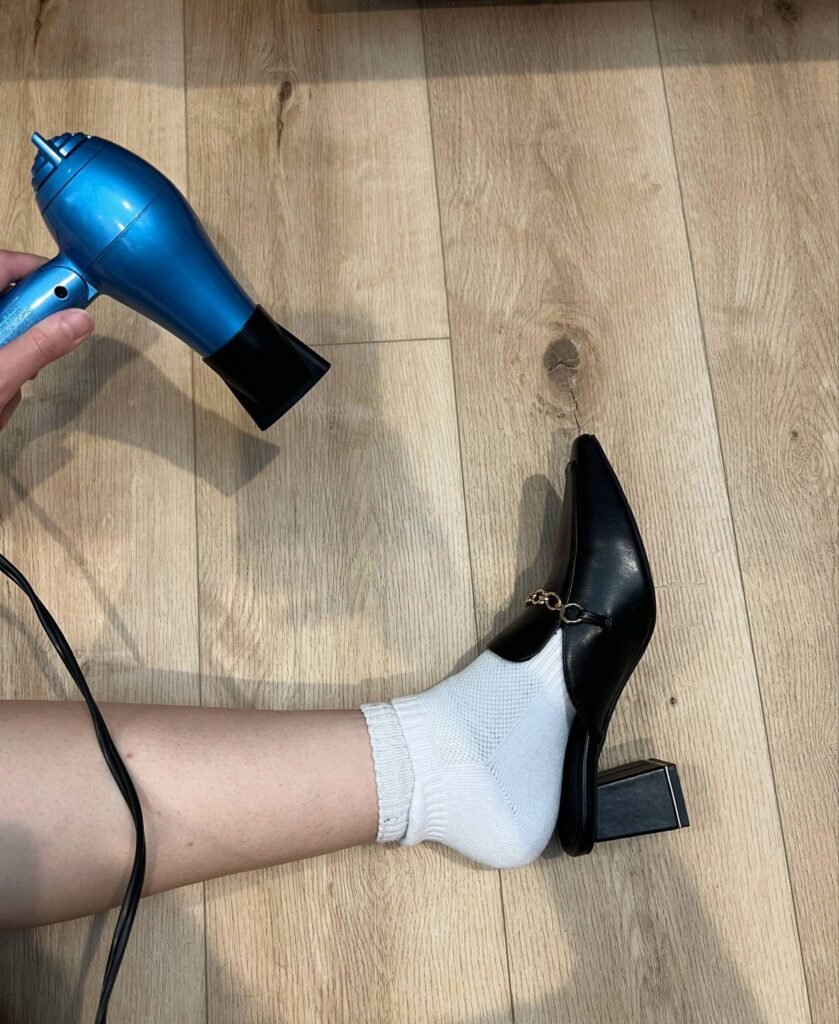
HAIRDRYER METHOD
Hairdryers aren’t just good for drying hair – they’re also an effective way to target and loosen up problem areas of your shoes, especially if you’re dealing with stiffer materials. I tend to use this method for heels and sneakers, but it does require some patience.
Here’s how:
- Wear a thick pair of socks, and if possible, have two layers for extra support. This will also prevent blisters in later steps of the process.
- Put on your shoes – if they’re heels, make sure they’re strapped on tight. If they’re sneakers, make sure they’re laced on tight.
- Take your hair dryer on low to medium heat, and keep it a good few inches away from the shoe (or just enough that you can warm it up without damaging the material).
- Once your shoes are warmed up, walk around in them so that the material can start molding to the shape of your feet. Stop when the target areas have cooled.
- Repeat the process until you achieve your desired level of comfort and stretch.
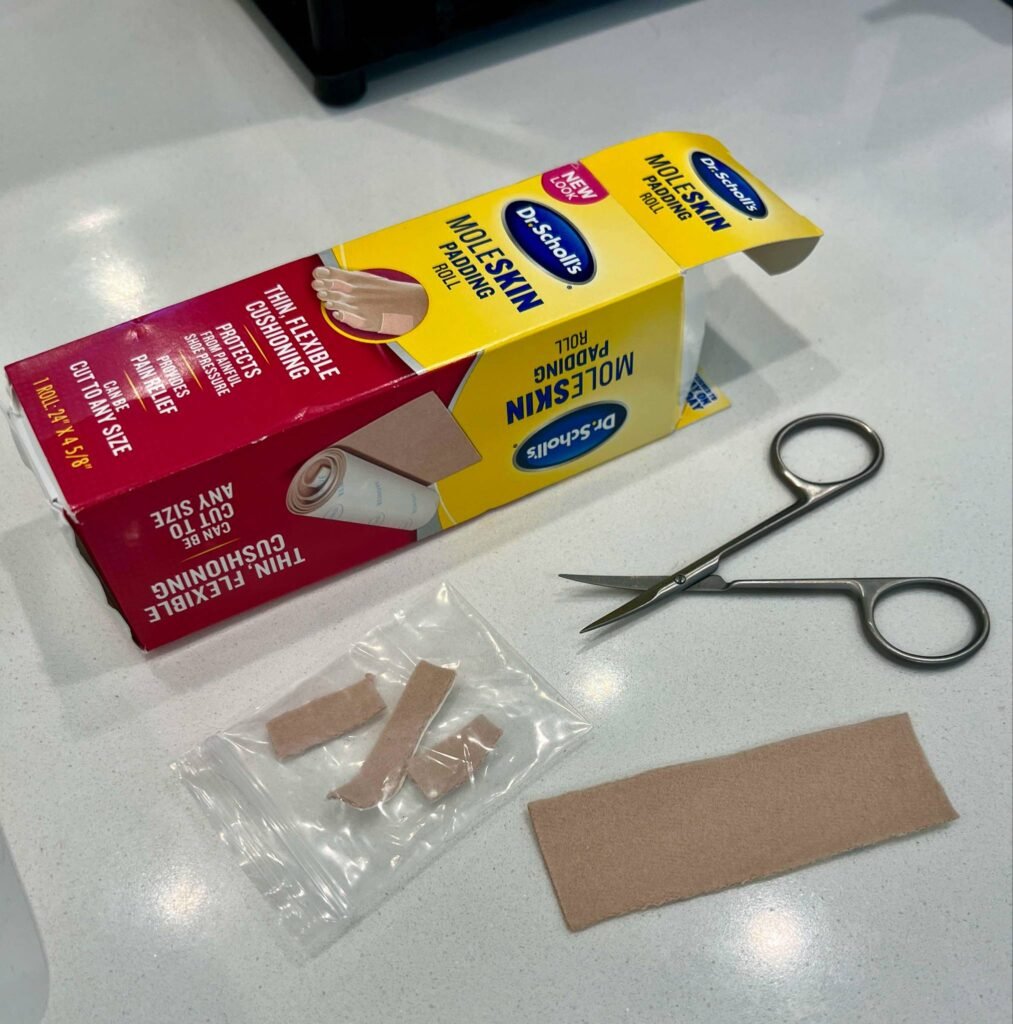
MOLESKIN METHOD
One of my absolute favorite travel essentials for happy feet while on vacation is moleskin! These are such a game changer when it comes to comfort for your aching feet after all that exploring. I use these both on the insides of my shoes AND on my feet to minimize blisters forming or foot pain from rubbing.
My favorite part about these is that they’re stretchy and can easily be cut to size – my travel hack is that I cut up a few pieces of these and keep them in a little bag stored in my travel pouch so that I can throw these bad boys on whenever I need them throughout the day.
I especially like to wrap these on the sides of my toe pinkies to prevent any rubbing throughout the day. I truly can’t recommend these enough!
If you prefer more of a band-aid type of solution, hydrocolloid gel bandages are also great for protecting and treating sore spots. They’re also waterproof and are so amazing for quickly healing wounds – I always use these whenever I have blisters and I swear they heal so much faster with these on!
READ: Travel Essentials For Europe: The Ultimate Game Changers!


I hope my tried and true methods help you break in your new shoes quickly with no pain! These small steps go a long way in keeping your feet happy and healthy while you’re out conquering the world.
And if you know any other effective method for breaking in shoes quickly and painlessly, I’d love to know!


You May Also Like

10 Day Japan Travel Itinerary (As First-Timers!)
Fall Favorites: Easy & Stylish Combinations To Try NOW!